This template is using the free Ascend theme by Kadence. Kadence themes provides great documentation for the free version of the Ascend theme, this theme has a ton of settings and allows you to customize more than any other free theme we have used! That being said if you want to get creative you will likely need to use the themes documentation at: http://docs.kadencethemes.com/ascend-free/. Don’t hesitate to check it out and see what you can do. This is the very documentation we used to figure out how to create this portfolio grid template!
This template is driven by Posts, your homepage will automatically update to show the most recent 2 posts that you have published. The Latest Posts widget will automatically update to show your latest 4 posts. A bit about posts:
- Blog posts appear in reverse chronological order so that the most recent posts is the first post that your readers see.
- Post are dynamic and updated regularly.
- Posts have a time show which displays the date and time the post was published.
- You can assign categories and tags to posts which make them easier to find.
- Posts appear in RSS feed so readers who subscribe to your blog will receive your latest post in their RSS reader.
- Posts display the name of the post author.
Your template consists of one page – About – and four posts – Article 1, Article 2, Article 3 and Article 4 – when you are adding/editing in your site be sure to remember if you are editing your about page, one of the posts or adding a new post. When editing one of the posts you are able to go to quick edit mode to update the title, author as well as the date and time it was published!
Editing/Updating Pages and Posts
From your site’s dashboard:
Editing a Page
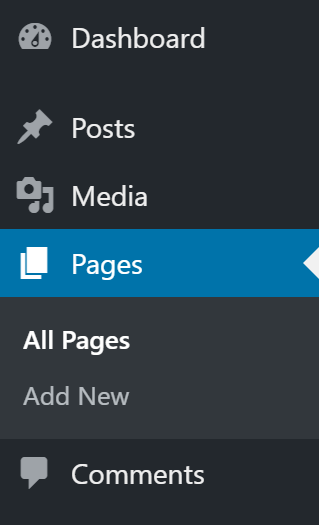
To edit a Page, click the Pages menu option and then click the All Pages link underneath or hover your cursor over the Pages menu option and click the All pages link in the fly-out menu.
Editing a Post
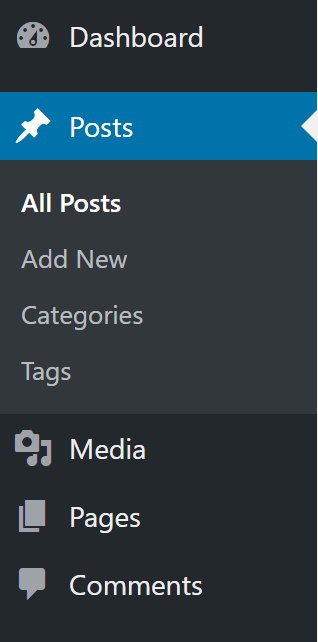
To edit a Post, click the Posts menu option and then click the All Posts link underneath or hover your cursor over the Posts menu option and click the All Posts link in the fly-out menu.

Let’s take a minute to go over this menu, Edit takes you to edit mode, Trash deletes the page, View let’s you view the page, Quick Edit let’s you do some cool stuff! Let’s take a look at the Quick Edit menu for pages and posts.

The image above is displaying the quick edit menu for a page. Here you can change the title and slug (the slug is what displays in the URL, e.g. https://www.yoursitetitle/sample-page). You can change the date the page was created on, password protect the page or make it private, allow comments, revert it to draft or publish it. You can assign it a template, you can create your own template but we will stick to the default or use one that comes with the sites theme. You can also assign the page as a parent page (consider your site’s navigation here as this will drive your breadcrumb trail).
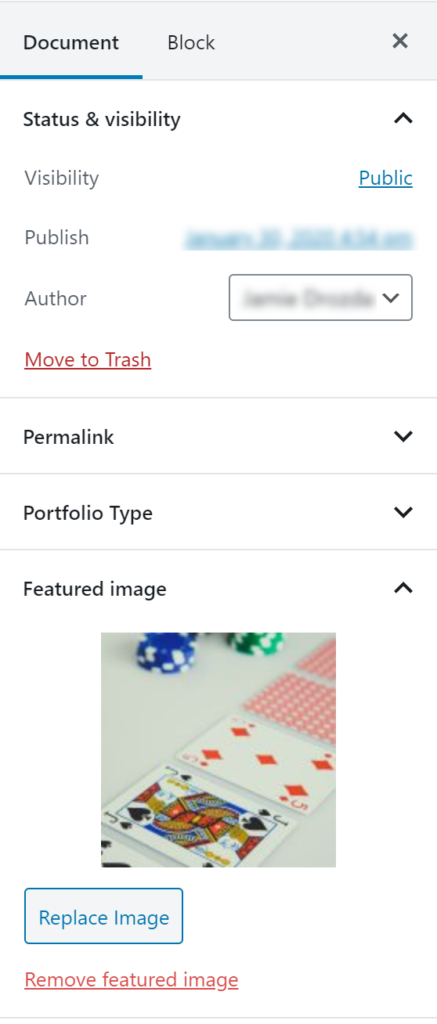
When you are in edit mode of a page or post you will notice these options are available to you on the right side of your screen. If they are not, you are seeing the properties of the block you are editing. Click on Document to show the pages properties. Again, while you are checking out the right side of your screen, look at the options available to you for each block you’ve added. Play with them, have some fun, see what you can do!

The image above is displaying the quick edit menu for a post. It has all the same options as a page and it also has a few additional features. Here you can change the post’s category and add tags. For help with creating categories go to https://wordpress.com/support/posts/categories/. To learn more about the differences between categories and tags check out https://wordpress.com/support/posts/categories-vs-tags/. Finally, you will find some good tagging tips at https://wordpress.com/support/posts/categories-vs-tags/tagging-tips/.
Changing the Thumbnail Images
The images displaying in the thumbnail on the home page and in the Latest posts widget are the featured images for each post. To change the image for each thumbnail simply change the featured image for the corresponding post. The following instructions outline how to replace the current image with a new one:
- Click the Posts menu option and then click the All Posts link underneath or hover your cursor over the Posts menu option and click the All Posts link in the fly-out menu.
- Click Edit for the Post you want to replace the image for
- Ensure Post is highlighted in the right hand menu
- Click Featured image to expand
- Click the Replace image button, you will be able to upload a new image or select an image that has been uploaded to the sites Media Library. (If this is a new Post click Set featured image)
- Don’t forget to click Update to save your changes!
Editing the Tagline
First you’re going to want to update the sites tagline. To do this go to the dashboard and click the Settings menu option, then if necessary click the General link underneath or hover your cursor over the Settings menu option and click the General link in the fly-out menu.
Next, update the Tagline field and click Save changes. If you do not want a tagline simply delete the place holder text and leave the field empty, don’t forget to click Save Changes.
Take note of the Site Title field above the Tagline field, this is where you can update the site’s title. This does not change the URL to the site, once a site is created you cannot change it’s URL.
While you are here take notice of the Writing link under General. This is where you can control whether or not emoticons convert to graphics, change the default post category and switch the default editor. If you switch the default editor we recommend you allow users to switch editors. If you choose to reuse one of the templates pages and want to keep it’s layout you will need to use the block editor rather than the classic editor.

Update the Banner Image
Click the Appearance menu option and then click the Theme Options link underneath or hover your cursor over the Appearance menu option and click the Theme Options link in the fly-out menu.
A menu listing all of the themes options will appear immediately to the right, click Home Page Header, here you have a lot of options. We recommend playing with them to see what effect they have on your ePortfolio. The most effective way is to make one change then click Save Changes and view the change to see if you want to keep it!
To update the header image scroll to the bottom of the page and click the Remove button then click the Upload button. You will be able to upload a new image or select an image that has been uploaded to the sites Media Library. Don’t forget to save your changes!
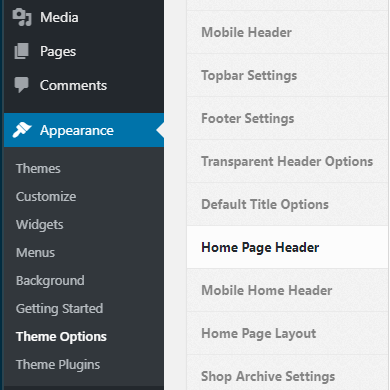
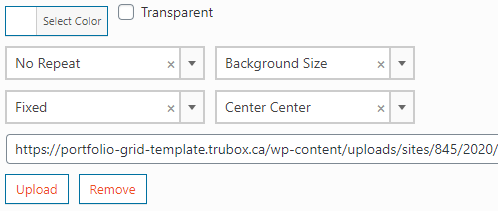
To update the banner image on all other pages follow the instructions above except click Default Title Options!
Editing the Footer text
Follow the instructions above except click Footer Settings instead of Home Page Header!
Edit the way Posts display on the Home Page
Click the Appearance menu option and then click the Theme Options link underneath or hover your cursor over the Appearance menu option and click the Theme Options link in the fly-out menu.
Click Home Page Layout then click Module Latest Posts
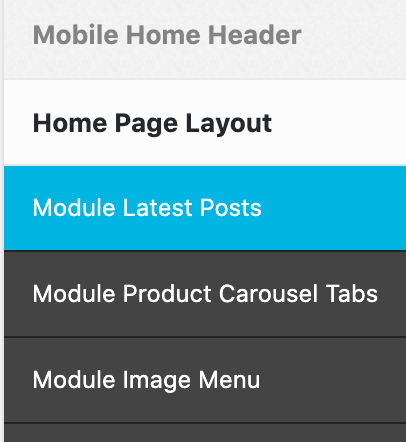
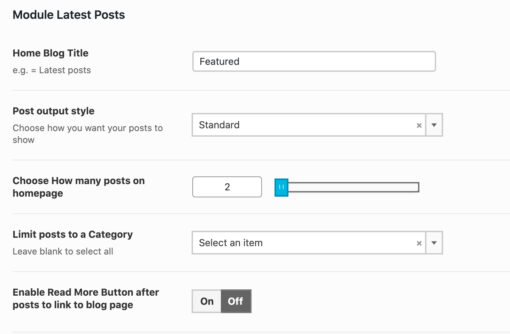
We recommend you play with these settings, refer to the image on the left when you want to revert back to the template defaults.
There are several options listed in the Post output style drop-down list, select one then save your changes. View the site to see your changes then come back and try another option! You will want to adjust the number of posts that show on the homepage to suit the option you like best.
Allowing visitors to comment on posts
- Click the Posts menu option and then click the All Posts link underneath or hover your cursor over the Posts menu option and click the All Posts link in the fly-out menu.
- Click Quick Edit for the appropriate Post
- Check the Comments checkbox
- Don’t forget to click Update to save your changes!
